Back to Maintenance Manager for Manufacturing Main Menu
Progressing a Work Order
As an Administrator or Technician, you can manage work orders by progressing them through various stages, assigning technician, updating entries, adding tasks and comments, and marking work orders as complete.
Follow the below steps to progress and complete a work order using the streamlined process.
Methods to Progress a Work Order
There are two ways to progress a work order
A. By Clicking on the Work Order
Use this method to progress a new work order to complete and update the required details across all three views-- List, Workflow, and Calendar view.
1. Select and Assign a Work Order
-
Click a work order in the New section.

-
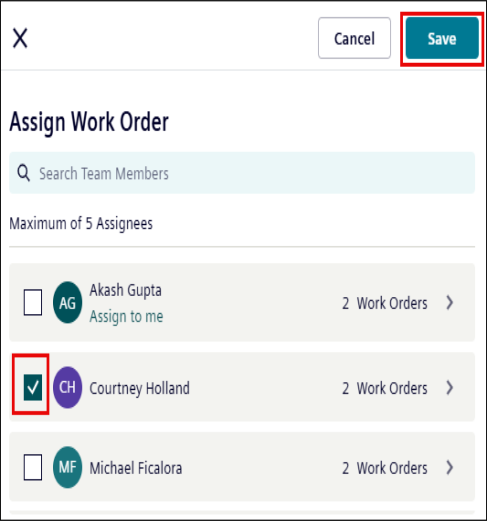
Click Assign button and enter or choose a technician to assign the work order.
-
Click Save.
NOTE A maximum of 5 technicians can be assigned.
2. Update Entries (As Needed):
-
Click on any of the following fields to edit:
-
Due
-
Work Category
-
Asset
-
Location
-
3. Add Parts
-
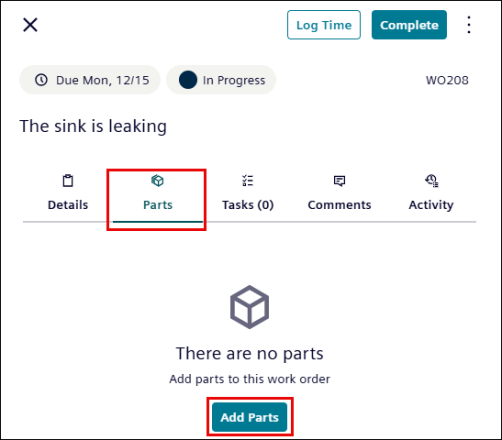
Go to the Parts tab, click Add Parts.
-
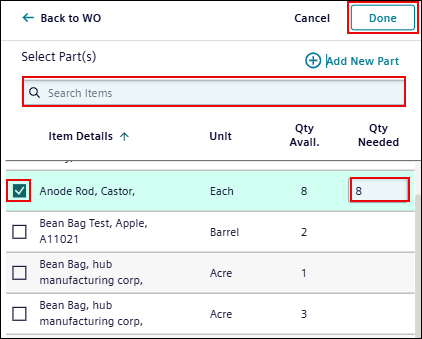
Search or select an item from the list and enter the number of items in Qty Needed field based on the Qty Avail. column.
NOTE
* Qty Needed cannot exceed the Qty Avail.
* Multiple items can be added.
-
Click Done.
4. Manage Tasks
-
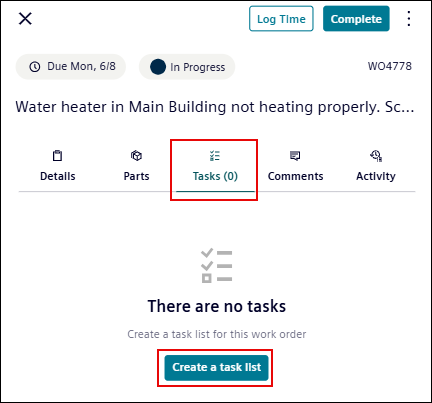
Go to the Tasks tab, click Create a task list button as required.
-
In Task 1, enter the task description.
-
Enter description in Task 2 and Task 3 as needed.
-
To remove a task, click
 icon at the upper right corner.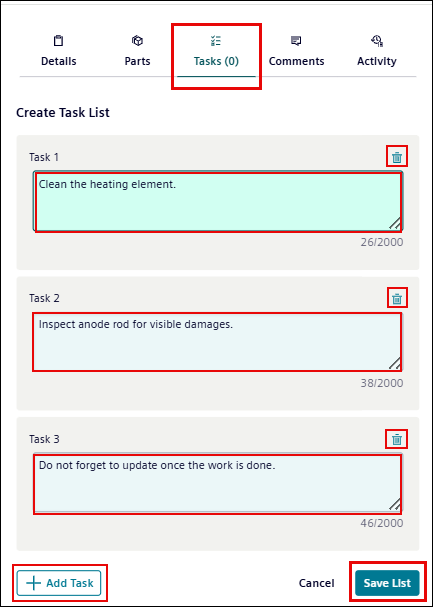
-
To add more tasks, click + Add Task at the bottom-left corner.
-
Click Save List to save or Cancel to discard the list.
-
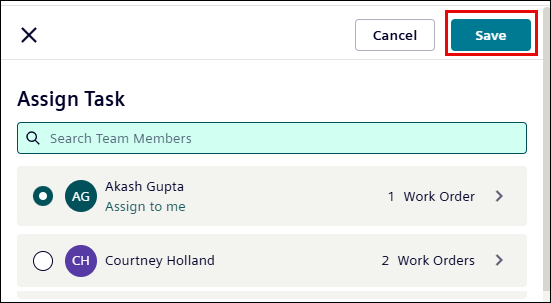
Click the task assignee profile to update assignee, then click Save.
-
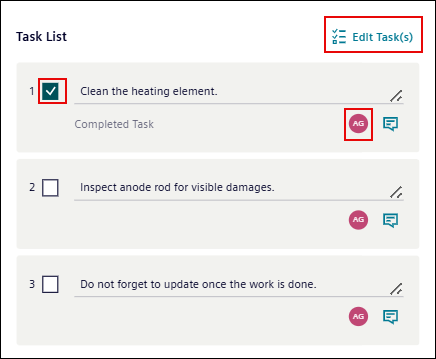
Select the checkbox to mark a task as completed.
-
Click
 > Add Comment to enter the comment.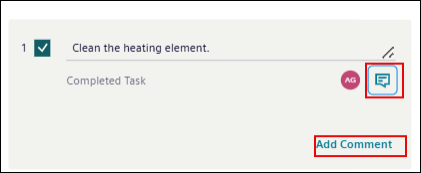
-
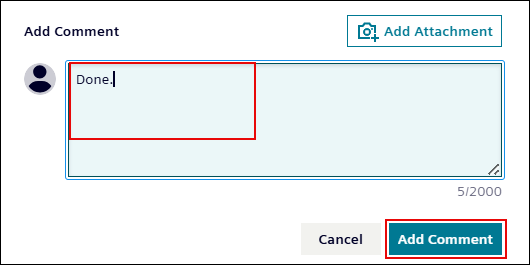
Enter your comment, then click Add Comment to save it or Cancel to discard it.
-
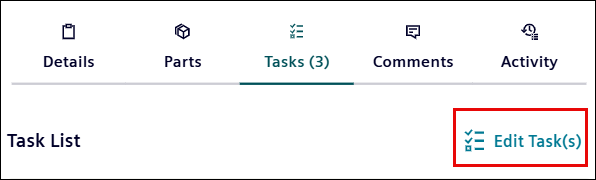
Click Edit Task(s) button at the upper right corner to modify the task list.
-
Edit the task description > click
 > Done to modify the task list.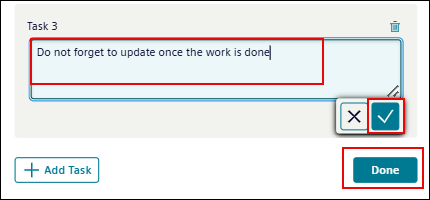
NOTE Alternatively, click Log Time next to the Complete button to enter Hours Worked and add a Comment.

5. Add Work Order Comments and Attachments
-
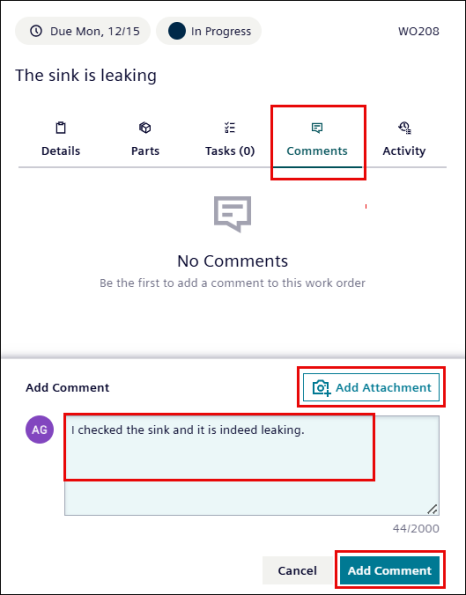
Go to the Comments tab, enter the comments to the work order, if required.
-
Click Add Attachment to upload files, if needed.
6. View Activities
-
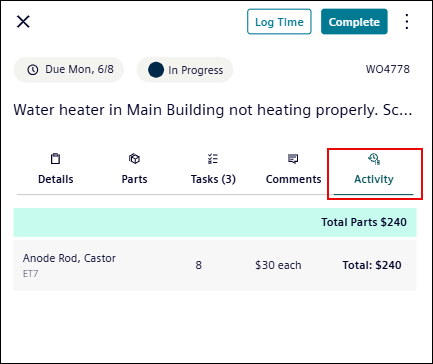
Go to the Activity tab, to view the parts rate, quantity and work order status (blocked/unblocked), and additional details.
7. Complete the Work Order
-
Click the Complete button at the upper right corner.
-
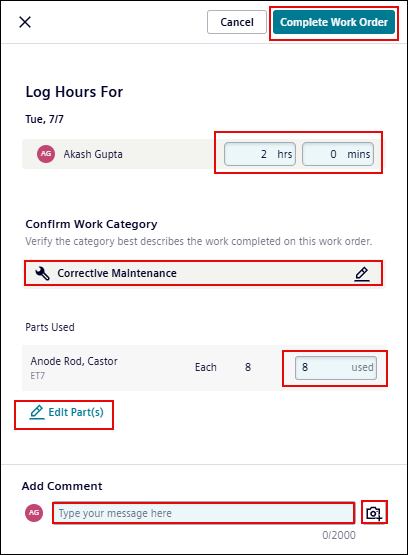
Before completing the work order, you can enter or edit below details as required:
-
Enter hours worked.
-
Enter parts used.
-
Edit part and Work Category.
-
Add a comment.
-
Add attachments.
-
-
-
Click the Complete work order.
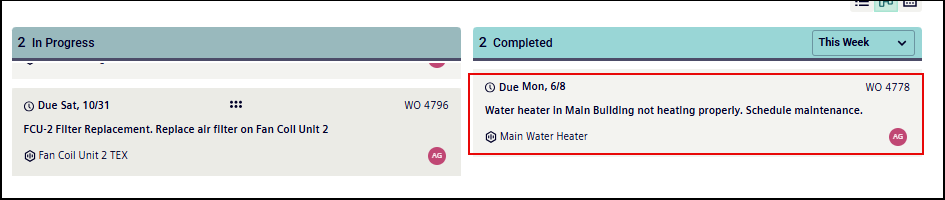
The work order moves to the Completed section.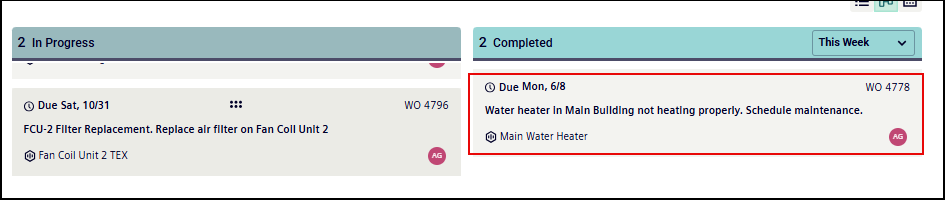
B. By dragging a Work Order (Workflow and Calendar Views)
Use this method to approve, assign, update, and move work orders in the Workflow views to progress a work order. Update Work Orders due date in Calendar view. Drag-and-drop does not work in the List view.
1. Assign Work Orders
-
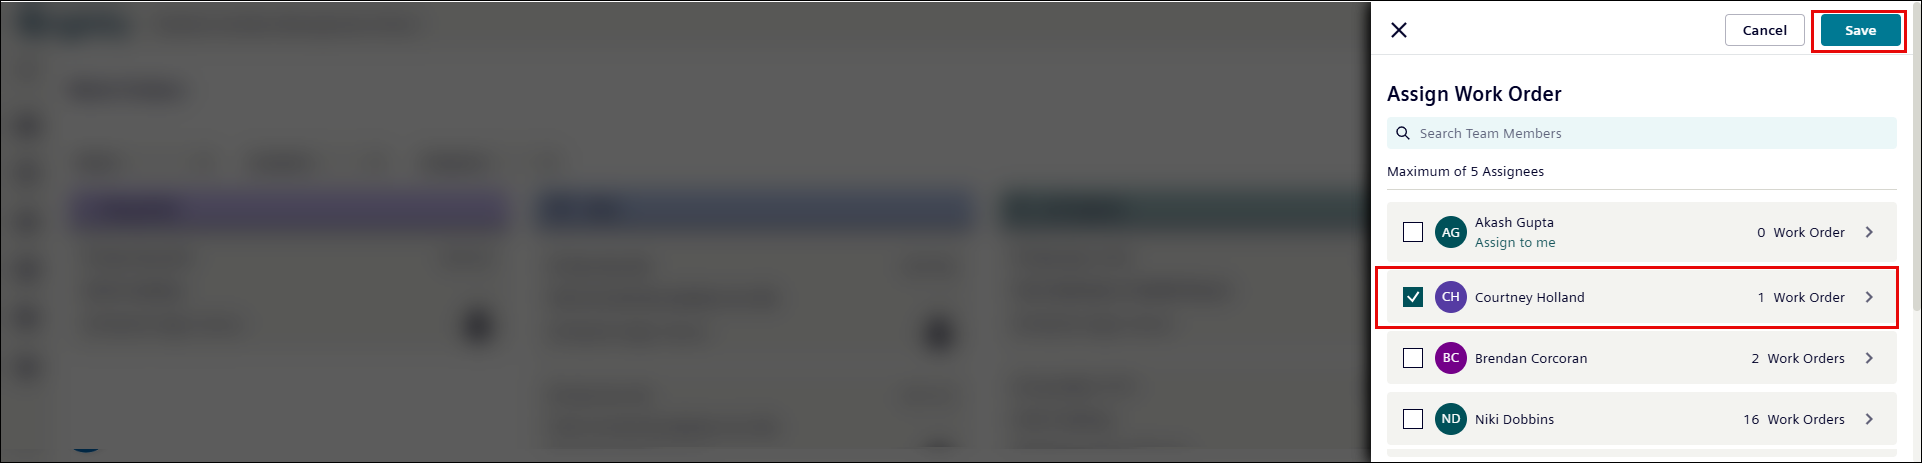
Drag and drop a Work Order from New to In Progress section to assign a technician.
-
Enter or select a technician from the given list.
-
Click Save.
The Work Order moves to the In Progress section.
2. Complete Work Orders
-
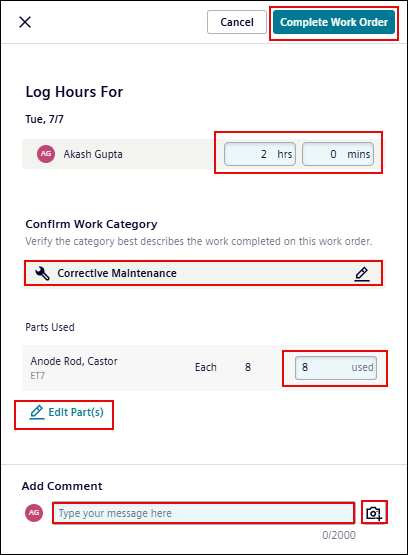
Drag the work order from In Progress to Completed
-
Before completing the work order, you can enter or edit below details as required:
-
Enter hours worked.
-
Enter parts used.
-
Edit parts and work category.
-
Add a comment.
-
Add attachments.
-
-
Click Complete Work Order.
The Work Order appears in the Completed section.